Winipac
Windows 98/ME/XP/2000 Programming Utility
Introduction
For programming and running with the programmed settings, the MAME/ALT jumper must be set to "ALT".
Codes are kept even after power off. Setting the jumper back to MAME will use the default MAME settings but any already-programmed info will not be lost.
Note you do not need to program a new board if you use in default MAME mode (Jumper set to "MAME").
Once you have changed the jumper to "ALT" there is normally no need to change it back again, as you can then download code sets as needed.
Installation and starting:
Unzip the downloaded file to a temporary folder and run Setup.exe
The program installs, by default, into c:\program files\winipac\
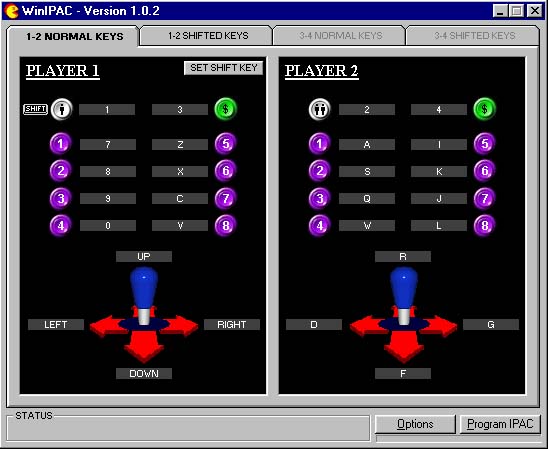
Run the program "winipac.exe"
Configuration:
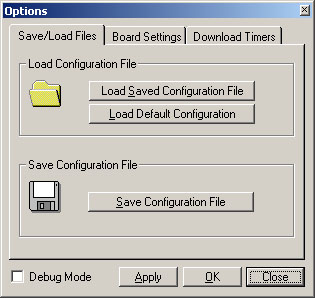
Before going any further, some configuration will be necessary. Click on the "Options" tab to bring up the configuration menu:
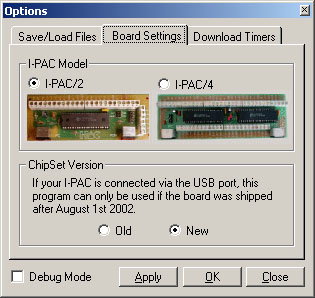
Now click on the "Board Settings" tab to disply the settings menu below:
First, select the correct board type, I-PAC2 (28 inputs) or I-PAC4 (56 inputs). You can choose I-PAC2 when programming an I-PAC4board if you only want to program player 1 and 2 settings.
Leave the "new" setting unless your board is a pre-August 2002 board, in which case you need to choose the "old"setting and the board cannot be connected via USB when using this program. Selecting this setting enables the original download protocol which will not work with USB.
Clicking on the "Download Timers" tab displays a slider-bar menu. This can be used to slow down the download process for some PCs that need it. The pre-set setting should be OK for most setups and it should not be necessary to adjust the sliders.
Clicking "OK" saves the settings to an INI file.
Now return to the "save/load files" screen.
If this is a first-run, click on the "Load Default Settings" box. This will load the MAME default settings into the program.
After changing/assigning keycodes (see later), settings can be saved to a named file in the save/load dialog boxes. The default file extension is ".IPC".
Assigning Keycodes:
Return to the main screen by closing the settings dialog box.
Select which page of inputs you want to program (I-PAC4 only), Players 1,2 or Players 3,4. This selection is greyed out for I-PAC2
Now click on the grey box next to the input (control panel button or joystick direction) you want to assign.
Press the keyboard key of the required keycode you want to assign to this input.
As well as normal inputs you can program the shifted key set:
How the I-PAC Shift Button Works
When a shift button has been assigned, pressing and holding this button causes the "SHIFTED" code page to be used. The way this works is not the same as defining "key multiple" in an emulator.
To explain this, consider the following example which is part of the standard I-PAC code set in non-programmable mode (and can of course also be set up in programmable mode)
For example say "Start 1" is the shift button and "Player 1 Button 1" is "Coin 1" in the shifted codes. Now if you set this as a key multiple in an emulator, you could generate a coin insert by pressing these two buttons together. BUT you would also send the code for the first button you pressed. Imagine you are starting a game and have one coin insert already done and you want to play a 2-player game which needs two coin inserts. You press the key combination again to send another coin. Unfortunately what may happen is that a one-player game will start as you have pressed "start1" as one half of the coin key combination!
How does the I-PAC get around this? When you press the "Start 1" (shift) button nothing happens immediately. The I-PAC waits to see if you are going to press another key at the same time. If you do press the "Player 1 Button 1" the shifted "Coin 1" code is sent. If you don’t press any other button the "Start 1" code is sent when you RELEASE the "Start 1" button. So you don’t get any unwanted key codes.
The I-PAC4 has two shift buttons. The codes on the I-PAC4 are divided into two pages. Each of the two pages has it's own shift button which only acts on controls in it's own page.
Also you can select which input you want to be the shift button. Be careful with this because the shift button has a deliberately delayed response so don't make any buttons you use in the main gameplay the shift button.
The "Windows" key and other special keys can be programmed by right-clicking on the input. The power key currently only functions in PS/2 mode owing to a USB limitation.
When you have assigned all the required keys, click on the Options box and save the settings to a named ".IPC" file.
Now click "Program I-PAC". A progress bar should appear and when programming is complete a message will be displayed, "Programmed Successfully".
Changing Codesets "On-The-Fly"
The utility can be run with no user input, for programming from a batch file etc. This means you can send a correct configuration to the I-PAC for a particular application and then start the program.
The command format for doing this is "winipac ".
For example you might want to have a code set for MAME32 and one for a PC game. To set up the MAME32 set you would do the following (assuming MAME32 resides in the C:\MAME32 folder):
Program the keycode set as above and save the settings to a file, for example MAME32.IPC.
Open Notepad and type:
CD C:\"Program Files\WINIPAC"
WINIPAC.EXE MAME32.IPC
CD C:\MAME32MAME32.EXE
Save this as a batch file for example MAME32.BAT
Create a shortcut icon to run this batch file
Then clicking on the icon will cause the correct I-PAC code set to be invoked and then MAME will start.
 British Pound
 Euro
Euro
 US Dollar
 Australian Dollar
 Canadian Dollar
 Japanese Yen

